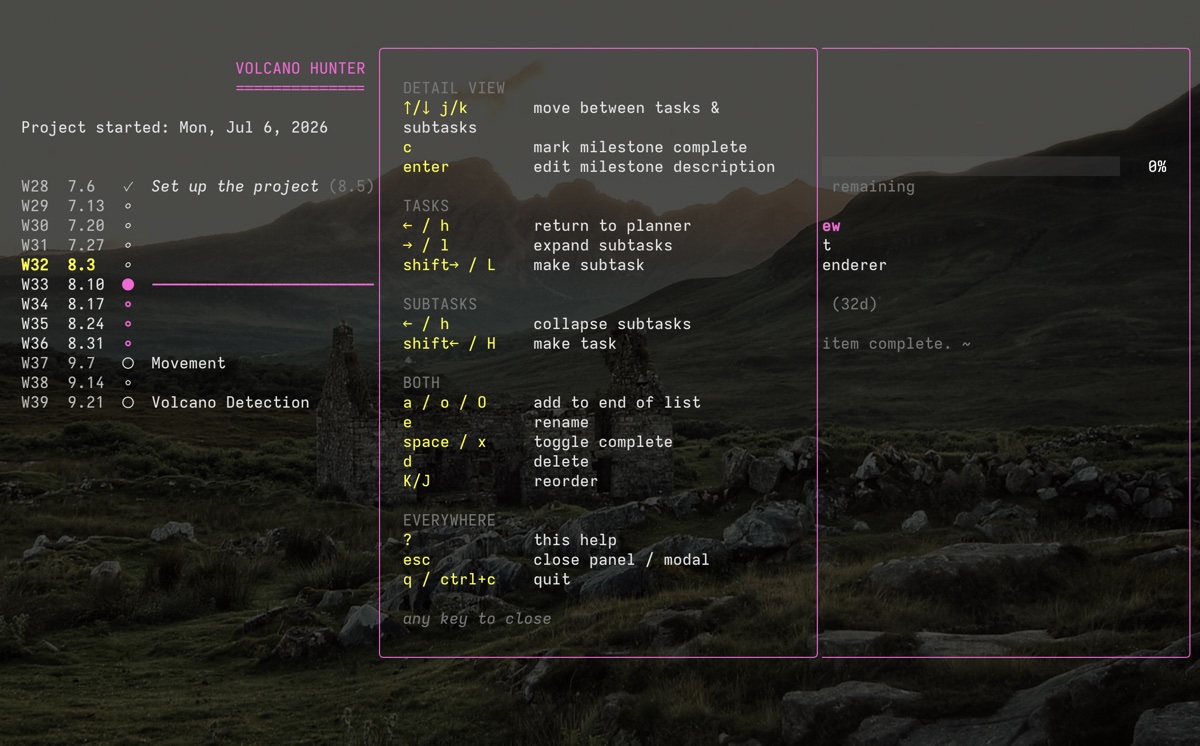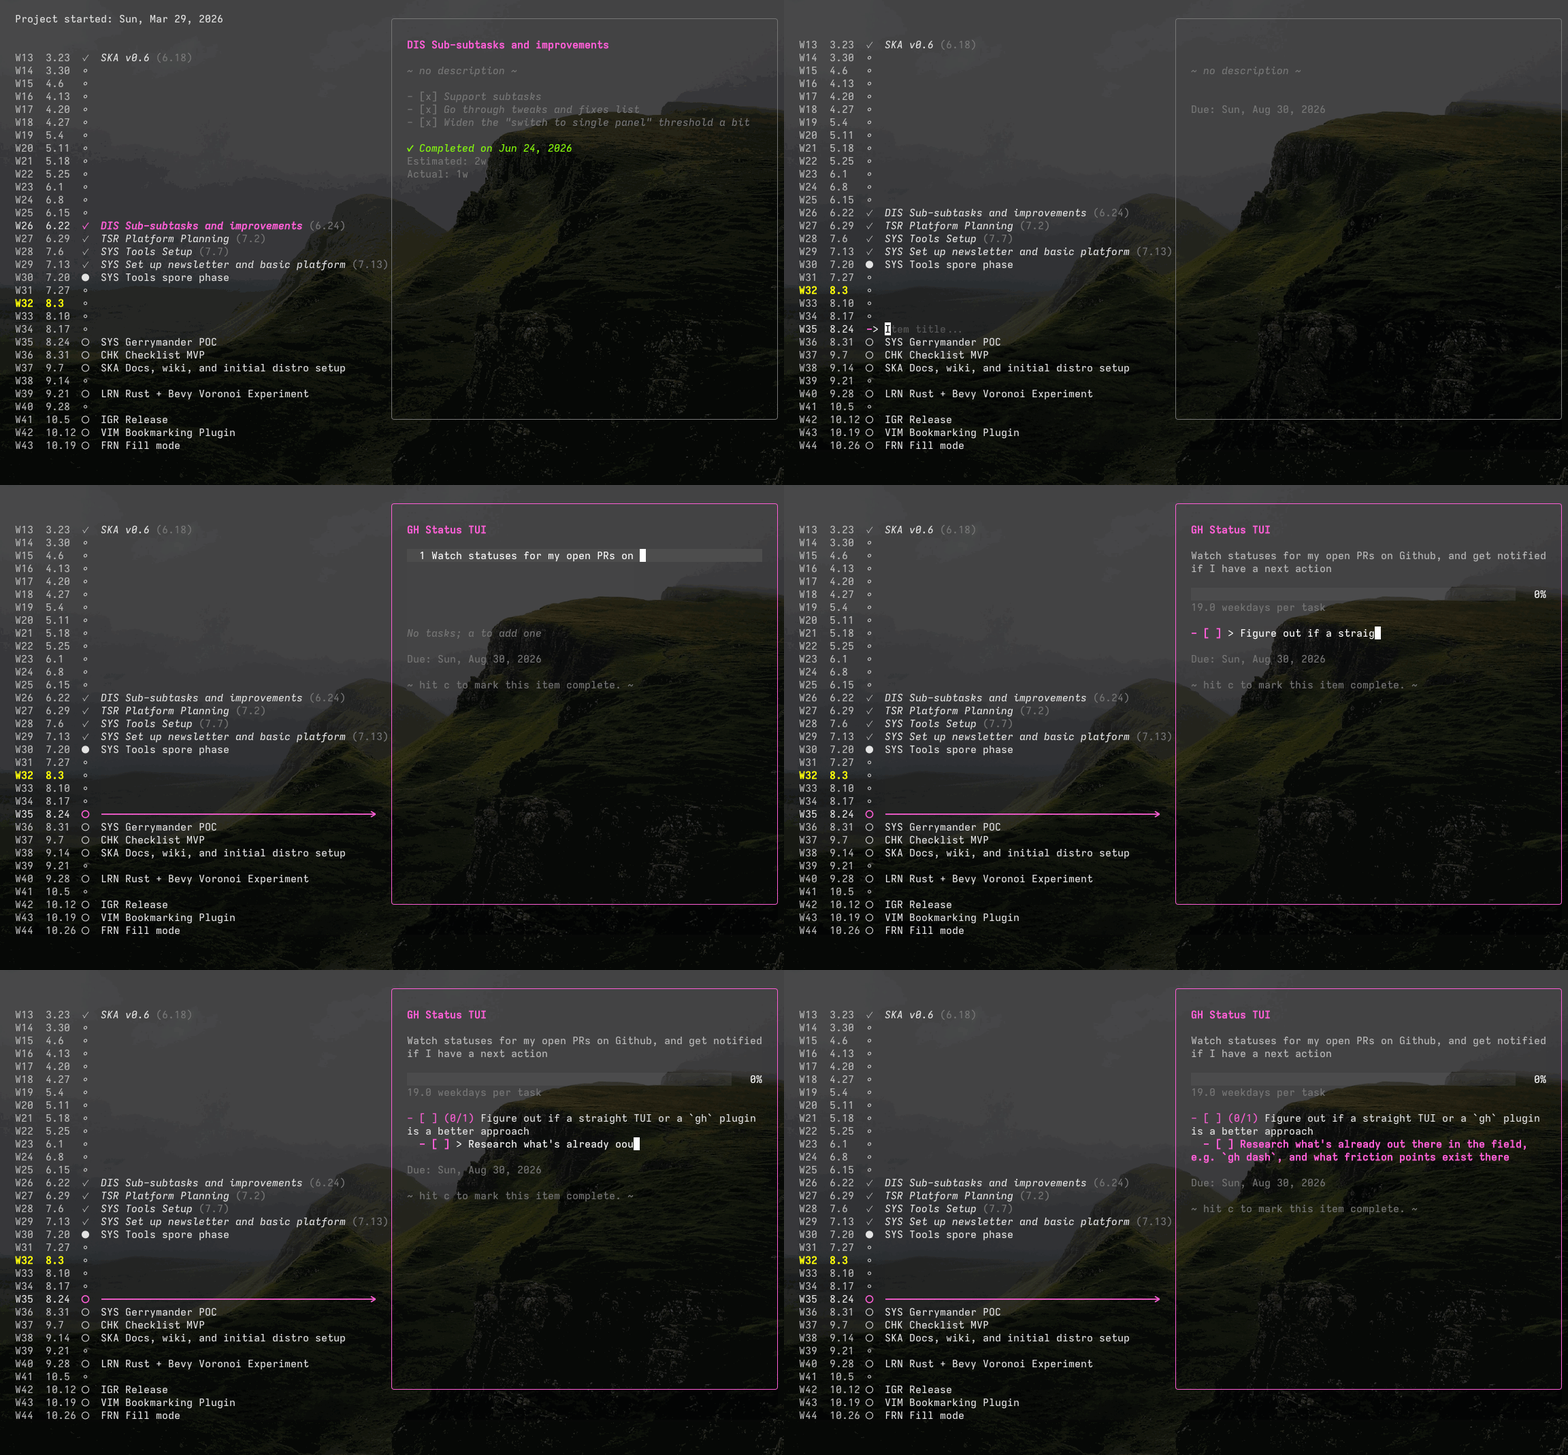
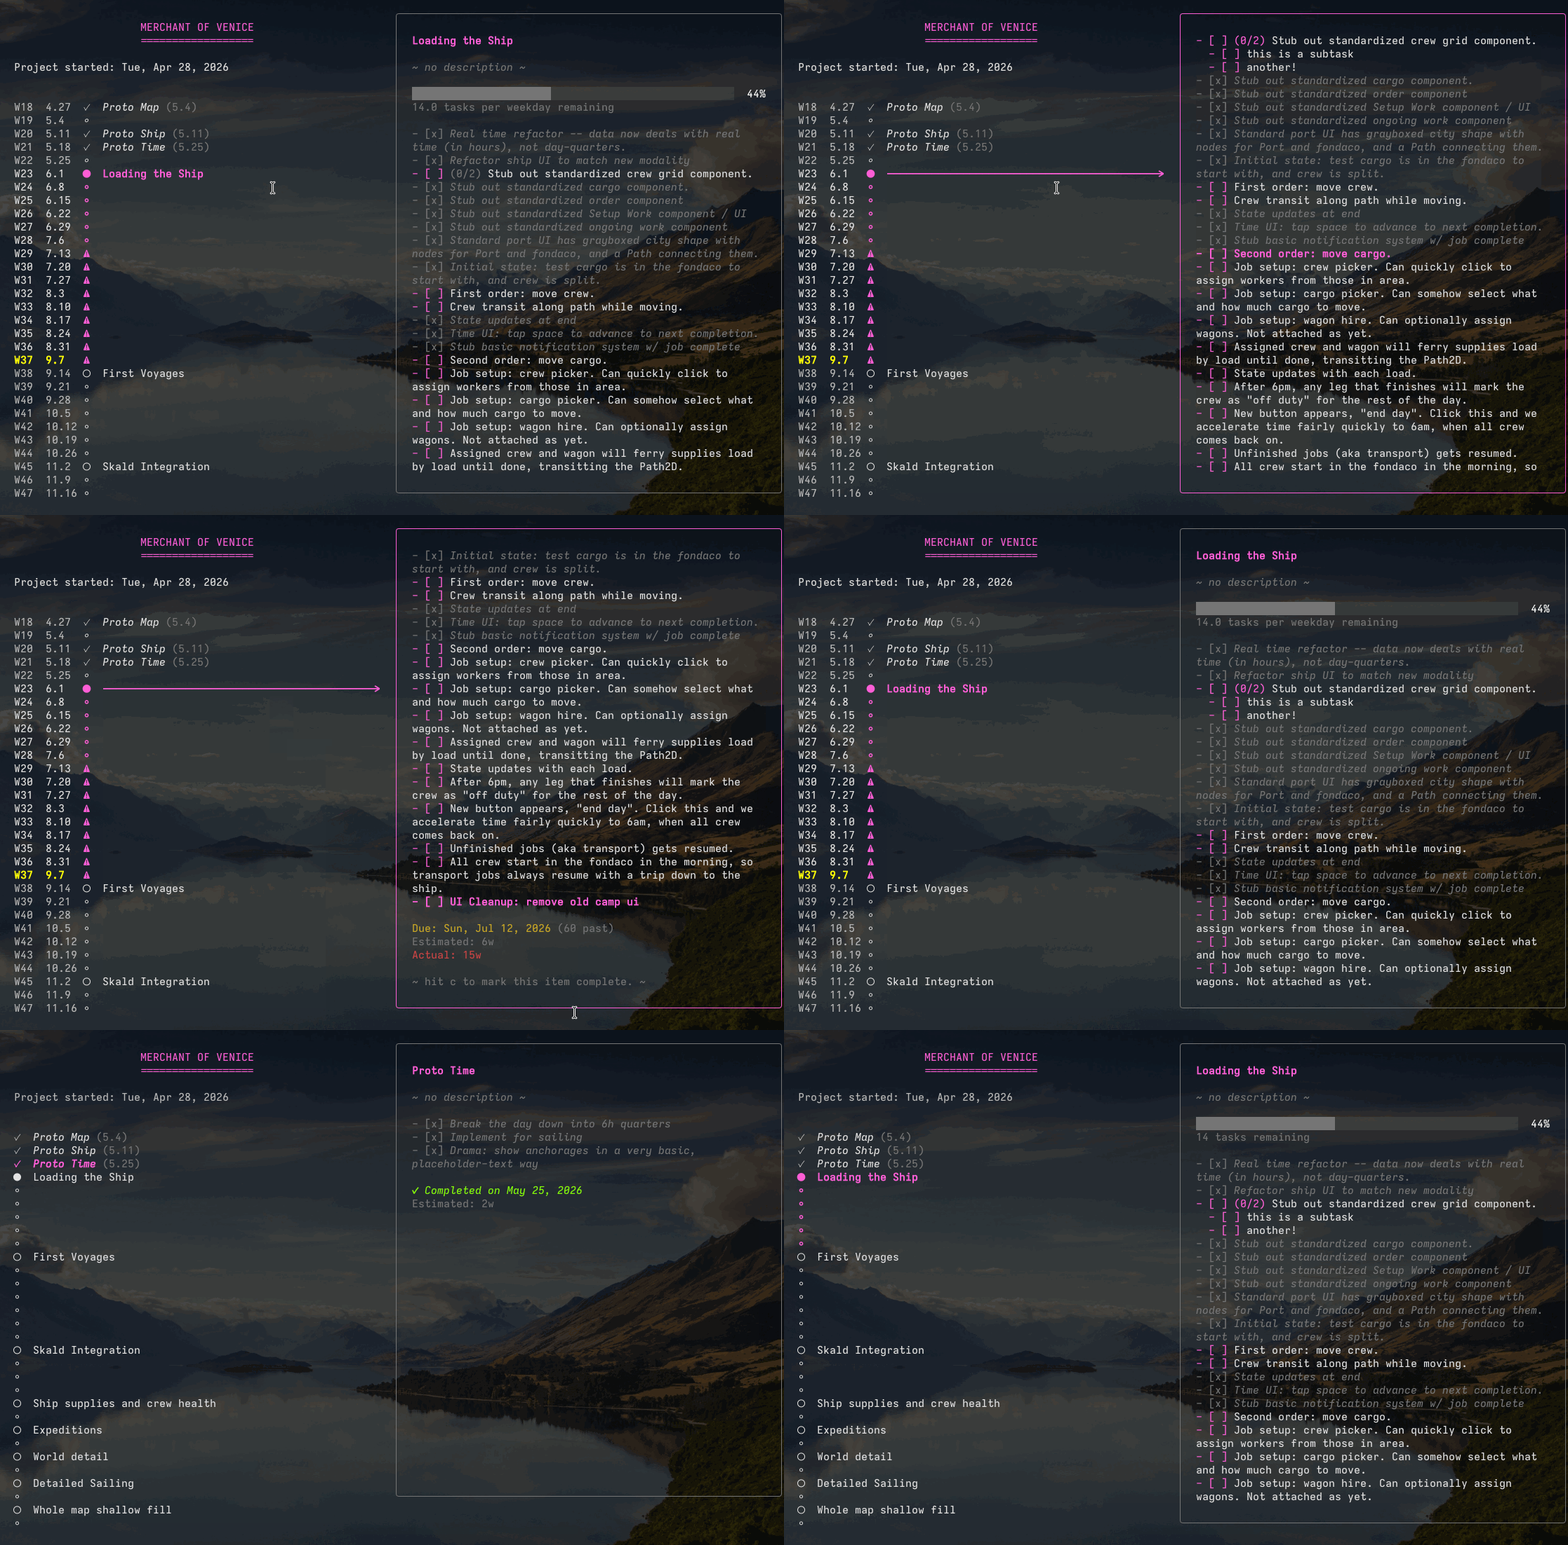
Dispositio is a tool for project planning and roadmap management in the terminal. Saves to simple markdown for easy inclusion in git repos or your Obsidian vault.
Installation
brew install tsraveling/tap/dispositio
scoop bucket add tsraveling https://github.com/tsraveling/scoop-bucket
scoop install dispositio
Download the .deb, .rpm, or .apk from the latest release and install it with your package manager, e.g.:
sudo dpkg -i dispositio_*.deb
Assuming you already have a Go toolchain:
go install github.com/tsraveling/dispositio@latest
Usage
Setting up a new project
Let's say we're making a game. "Volcano Hunter", a game about searching a vast and deep jungle for active volcanoes to study. (Note: I have my dispositio aliased in .zshrc to dis)
- Run
dispositio(ordisin my case) in the project root. - Confirm that you want to make
ROADMAP.md. - Hit
eto edit the project name. - If you want to edit the project start date, hit
sto bring up the Project Settings modal (see below).

Project Settings
We started work on Volcano Hunter a few weeks ago. You can hit s to open the Project Settings modal. On the project start date line, you can use the left and right arrows (or hl for Vim users) to change the project start date, optionally holding shift to change the date by a week at a time.
You can cancel changes and close the modal with Esc; Enter commits your changes and closes the modal.
No Timeline Mode
Below that is the Timeline mode setting. You can change this with left/right/h/l. A project with Timeline mode None turns off the timeline column, overdue states, and delivery estimates, and simply allows you to plan out a project in a linear fashion without worrying about calendar dates. You can still estimate duration of a given milestone but it is purely for reference, and not tracked against actual completion dates.
Adding some milestones
Now we want to start planning out our game.
- Create some milestones by hitting
ato add a new one.oandOadd milestones directly above or under the currently selected one, like in Vim. - Hitting
enterorright/lon an item goes into detail mode; more on this later. - Holding shift and hitting
right/left/h/lchanges the duration of a milestone, in weeks. - Holding shift +
up/down/j/kmoves the milestone up or down in the list.
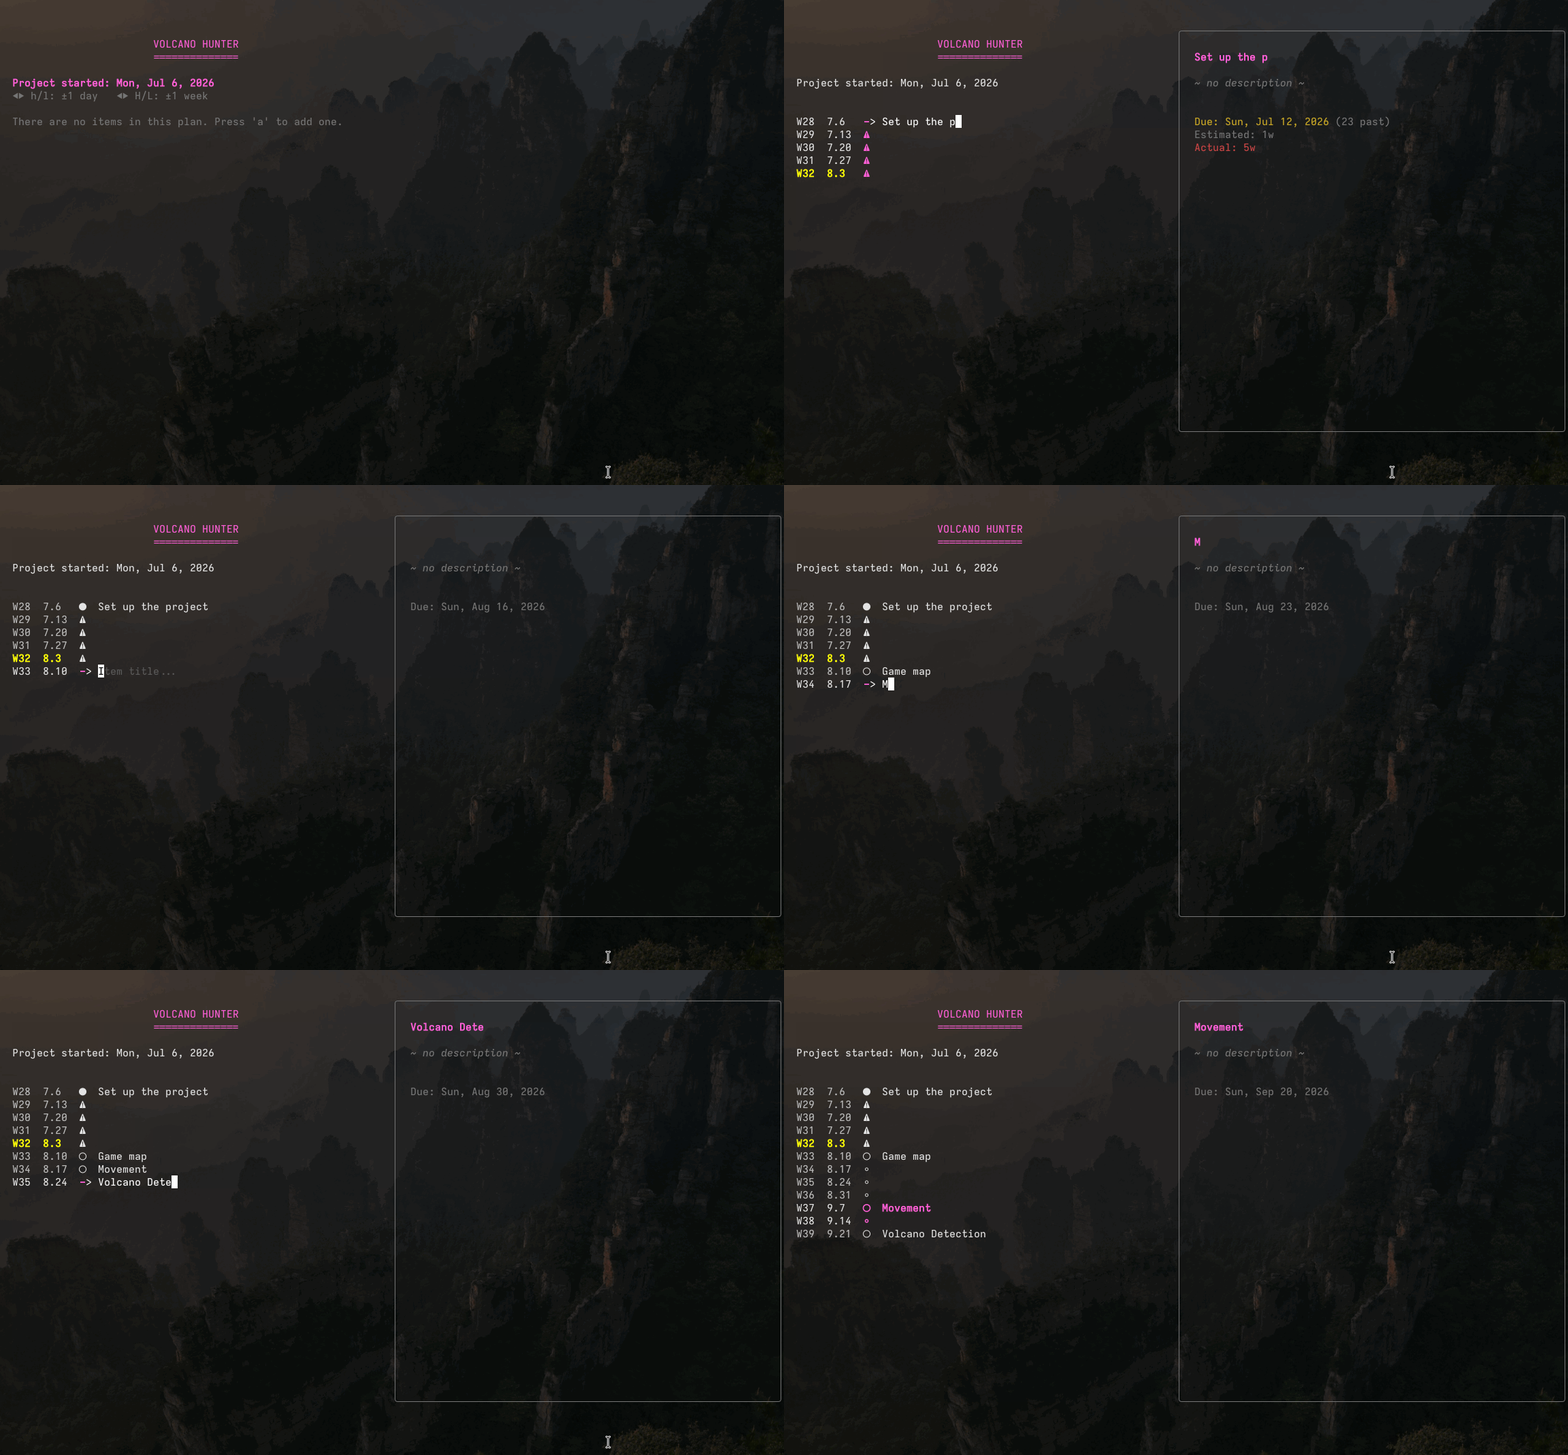
Notice a few things here:
- The leftmost column shows the estimated dates of a given milestone (as long as you don't switch project settings to
Timeline: None). TheW*column refers to the week number out of the year. If a project extends past the end of the current year, you will see a row break showing the new year. - Because we set the project start date as a few weeks ago, that first milestone shows some alert symbols. The duration of a milestone is one week by default; because that is the first milestone in the list, and it is not completed, Dispositio knows it is several weeks overdue! And it moves the timeline back as a result. This allows you to see how much a current delay impacts the overall timeline, including when future milestones are scheduled to start (e.g. the
Movementmilestone in the example above starts 9.7; if we delay another week it and other future milestones will get pushed back a week as well)
Note that in a non-timeline project, you can still change the "duration" of a milestone, which still adjusts the number of rows it occupies in the plan. But in this case the duration is simply aesthetic; it is not tracked against actual completion dates.
Tasks and subtasks
If you hit enter or right/l to go into "detail mode" (signified by the purple long right arrow and border), you can:
- Hit enter to type in a description. This can be whatever text you want; I usually use it for a general overall "definition of done" for the milestone.
- Hit
a/o/Oto add tasks, with the same rules as adding milestones above. - Hit shift +
up/down/j/kto rearrange tasks. - Hit
shift+Ato add a subtask to a selected task. - Hit shift +
left/right/h/lto move a task to be a subtask of the task above, or move a subtask out to be a regular task. - Hit
eto edit the name of a task. - Hit
spaceto complete or uncomplete a task.
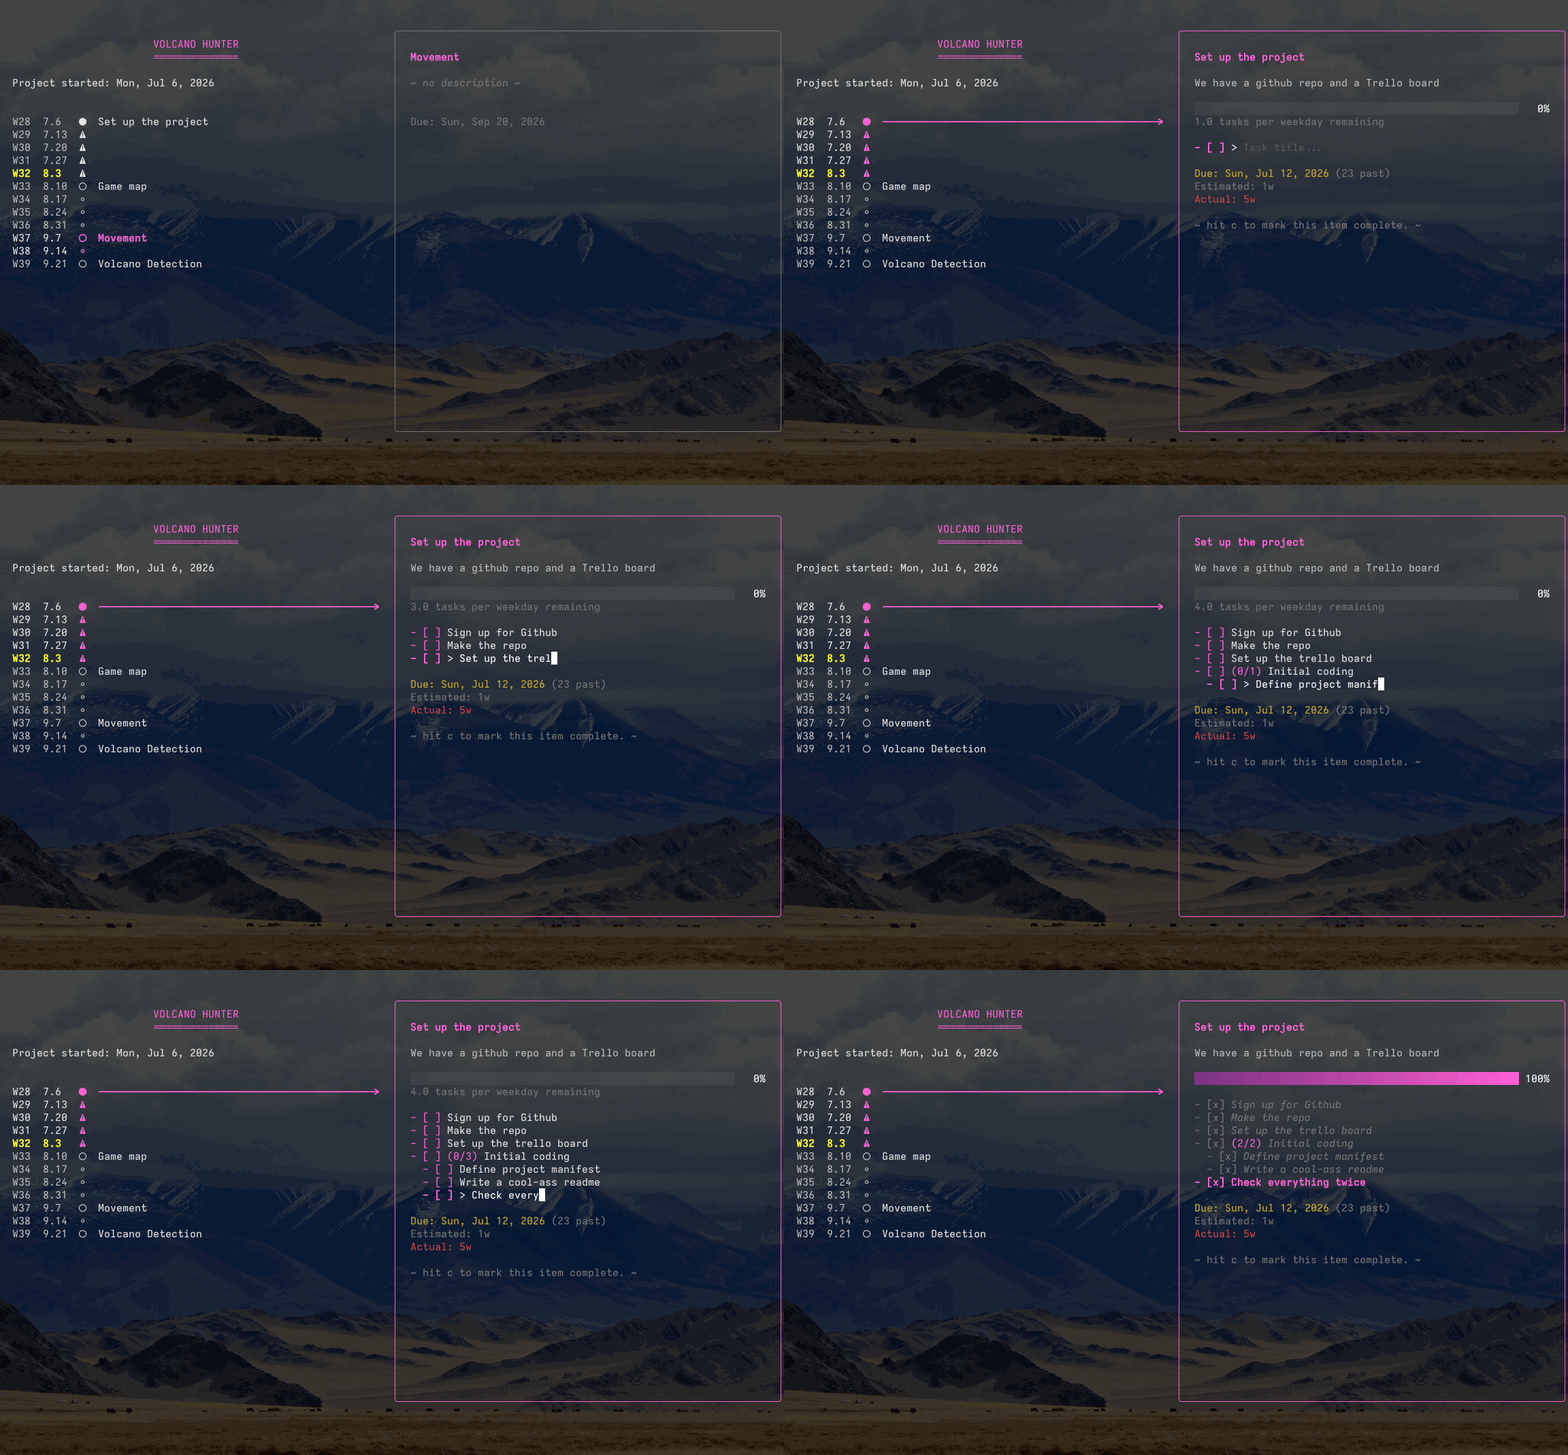
Notice:
- The progress bar fills out as you accomplish tasks. In theory, once it is full, you can complete the milestone (see next section).
- There is a "tasks per weekday" readout below the progress bar. Because this milestone is overdue, it just says "do all of the tasks in a day" to get finished. But in a normal milestone, you will be able to see how many workdays each task should take on average (or tasks per workday if the ratio goes the other way) in order to meet your goals. In non-timeline mode, this simply shows a "tasks remaining" counter.
Completing a Milestone
When you are ready to mark a milestone as finished, you can hit c in the detail view. You will see a confirmation; once accepted, the milestone is complete!
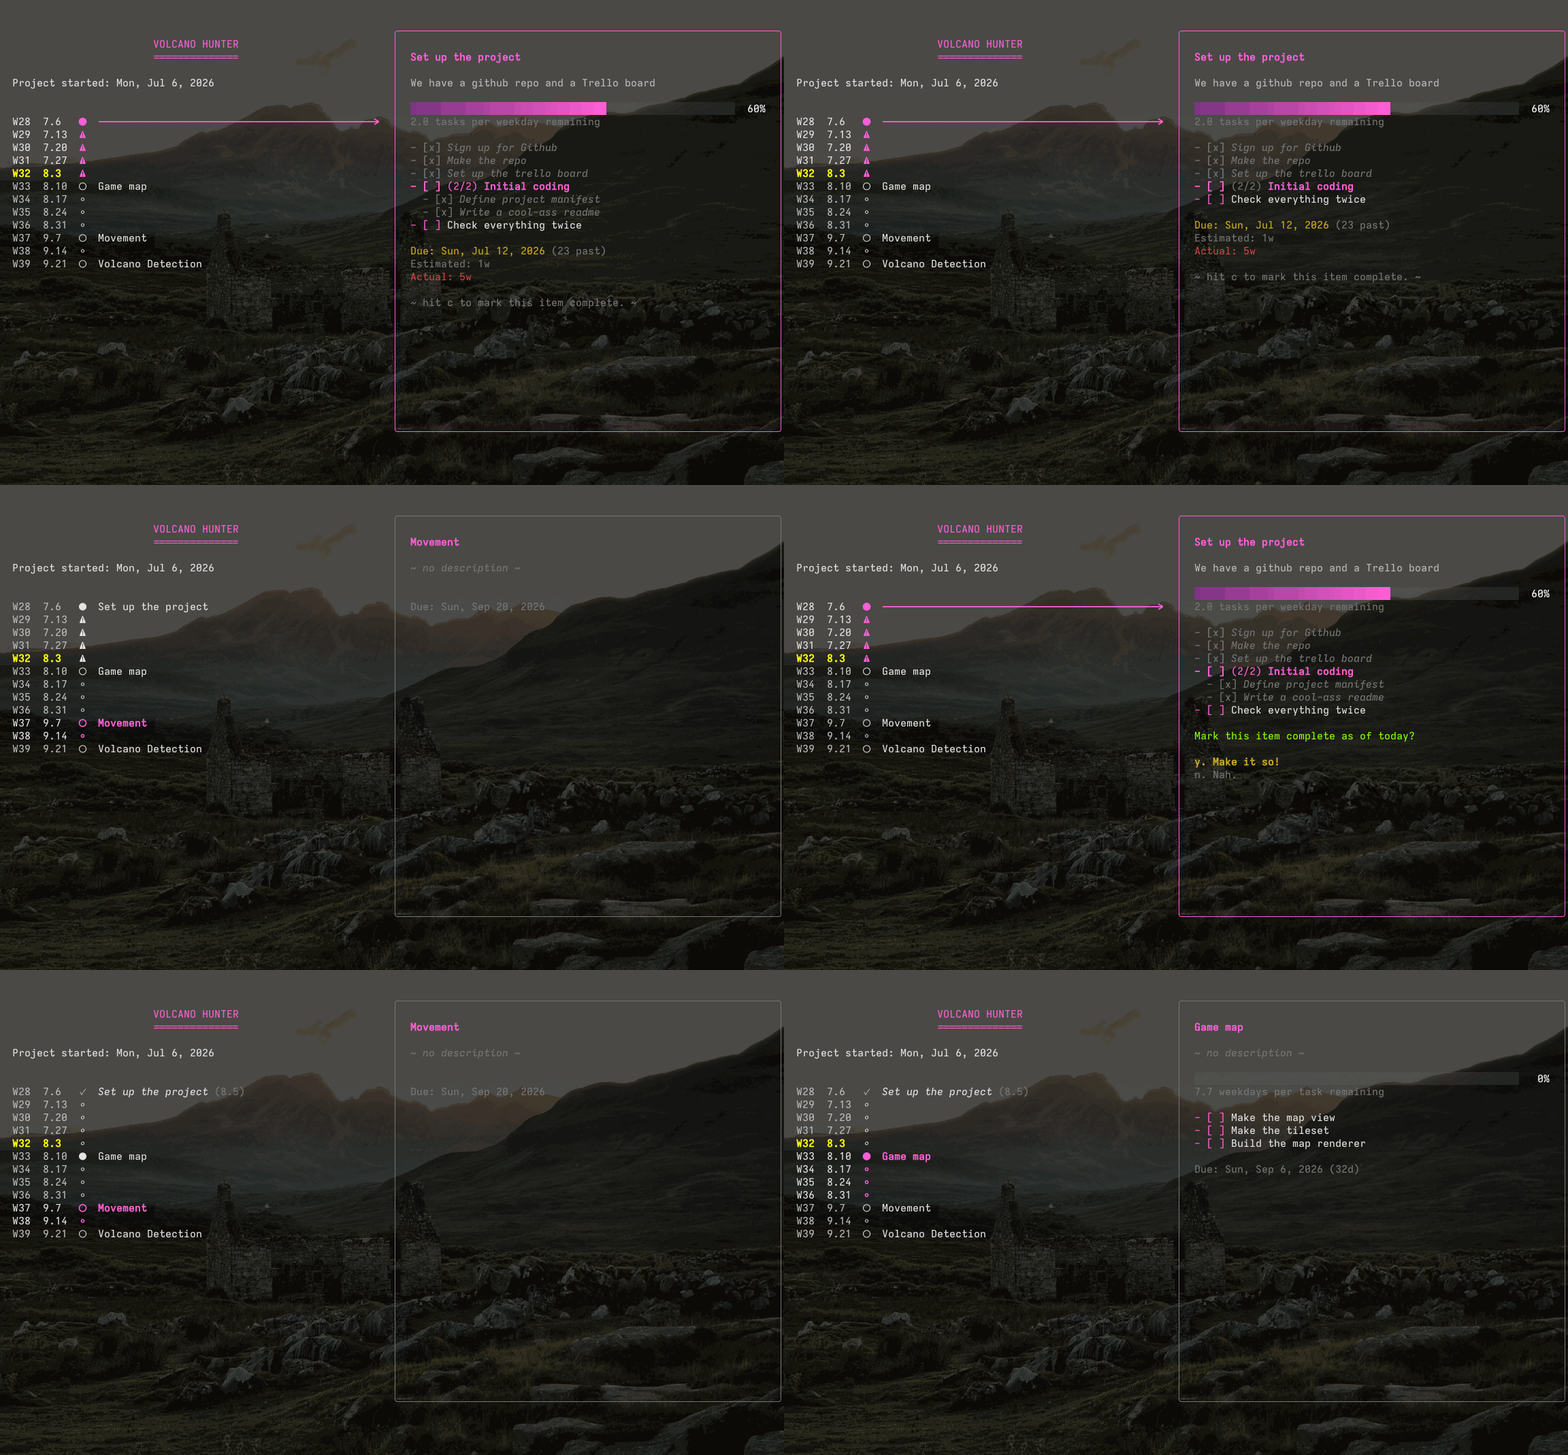
You will notice that the little character next to the milestone title becomes a checkmark -- this shows that it's complete. The next milestone, "Game Map", switches from a hollow circle to a filled one. This means it is your current milestone. The current milestone is always the first milestone not yet completed, and will always be highlighted when you first open Dispositio every day.
Help
Finally, for a full list of keybinds and functions on either the planning or detail screens, just hit ? (shift+/)!